

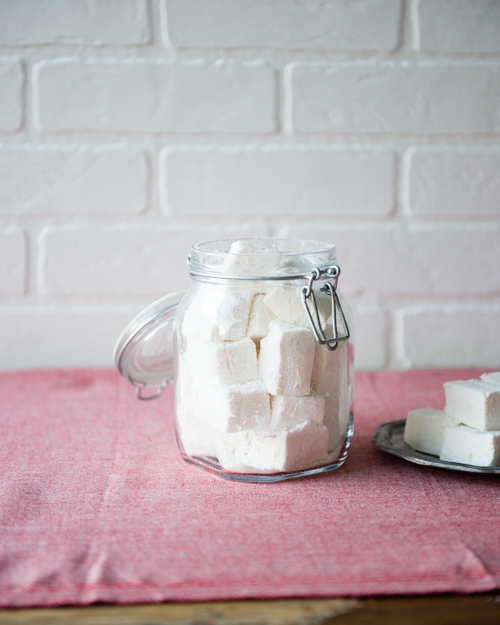
Let’s make marshmallows! Let’s make pretty bags of marshmallows, in lots of different flavors, and give them out to everyone we love!
Have you ever eaten a homemade marshmallow? They’re kind of game changer. I mean, I’m not one to complain about any sweet treat, so it’s not like I reject store-bought marshmallows, but once you’ve eaten a really good homemade marshmallow, nothing else quite compares.
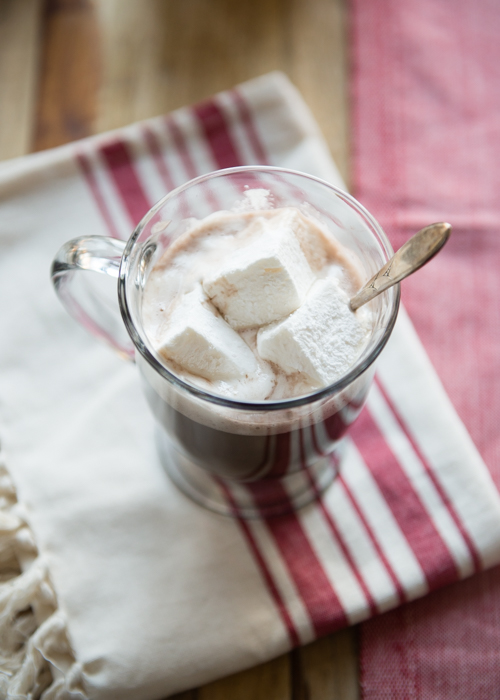
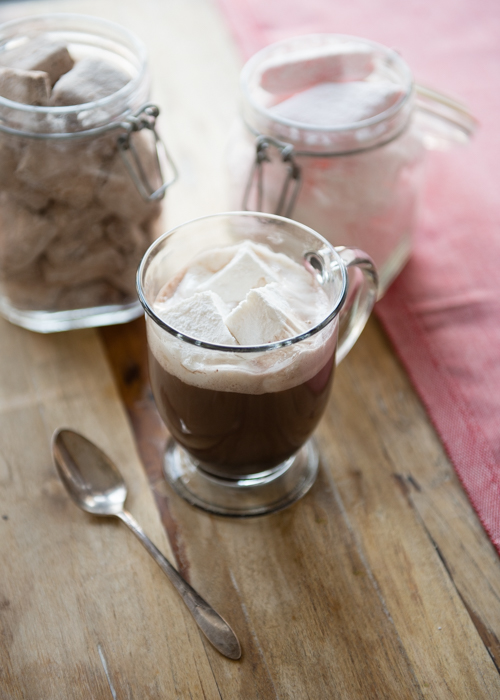
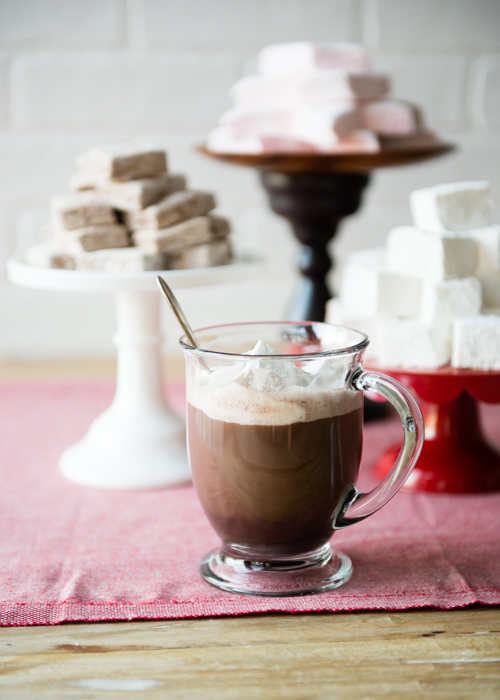
So let’s grab a mug of warm sweetness and get this sugar show on the road!
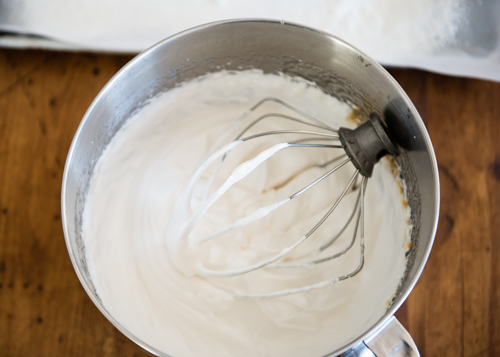
To make these marshmallows, a cooked sugar syrup is added to beaten egg whites, then melted unflavored gelatin is added in. It’s easier than you might think to make marshmallows from scratch, but it does involve getting the timing just right and adding the components in the right order. The gelatin is what gives the marshmallows their squishy-ness, and is a very necessary ingredient. Without it, the marshmallows wouldn’t set up. It has to be added last because the marshmallow creme sets up very quickly! You have to work kind of fast, so make sure to have the baking sheet, parchment, and cornstarch ready to go.
One thing to plan on when making these marshmallows is to leave enough time for them to set up. They really benefit from a good 3-4 hours, and are even better after they’ve sat overnight before cutting them into shapes. (See the time-saving tip in the notes section in case you’re in a hurry.)
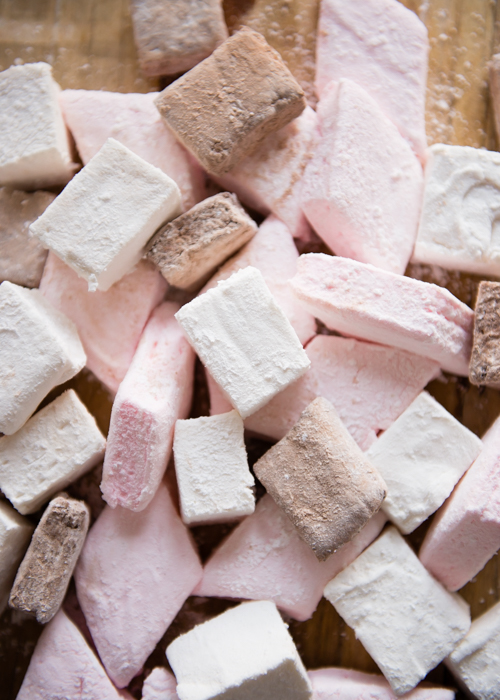
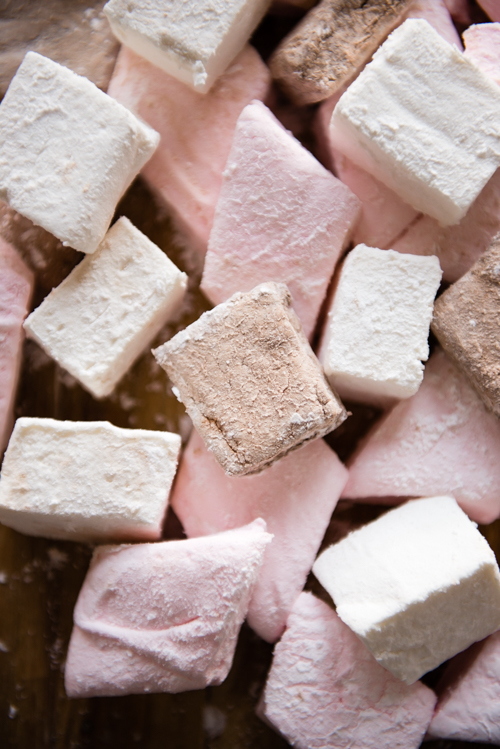
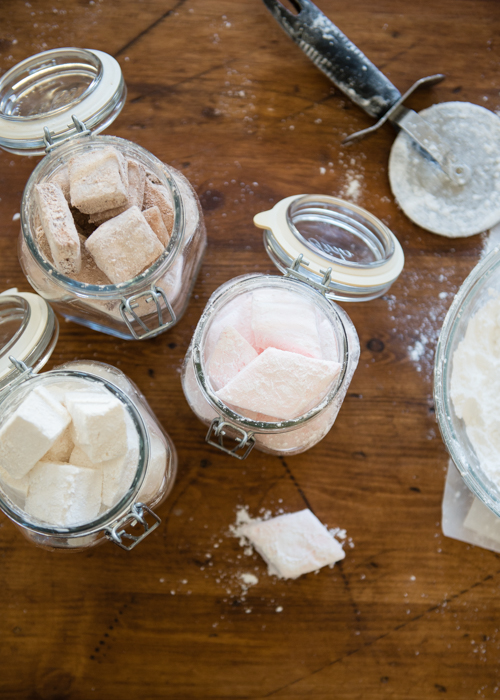
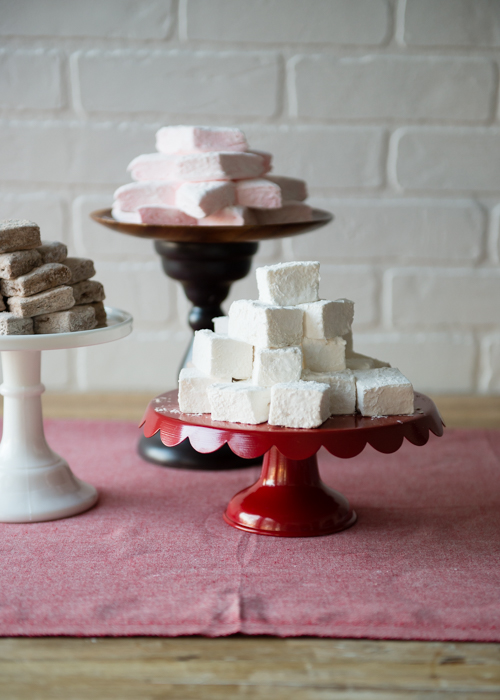
Now, it probably goes without saying, but you can make the marshmallows any flavor or color you can dream of. You can add just about anything you want — vanilla, peppermint, chocolate, pumpkin or fruit purees, spices, and other extracts. Ground cinnamon is amazing, as you would expect. The sky’s the limit! And that also goes for cutting the marshmallows into fun shapes.
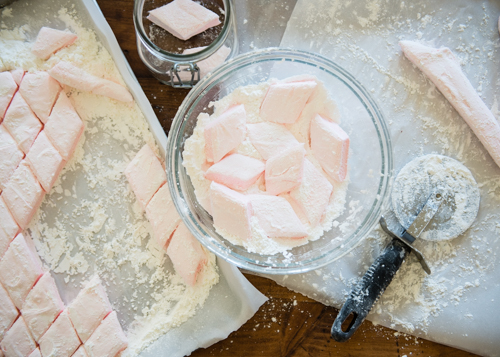
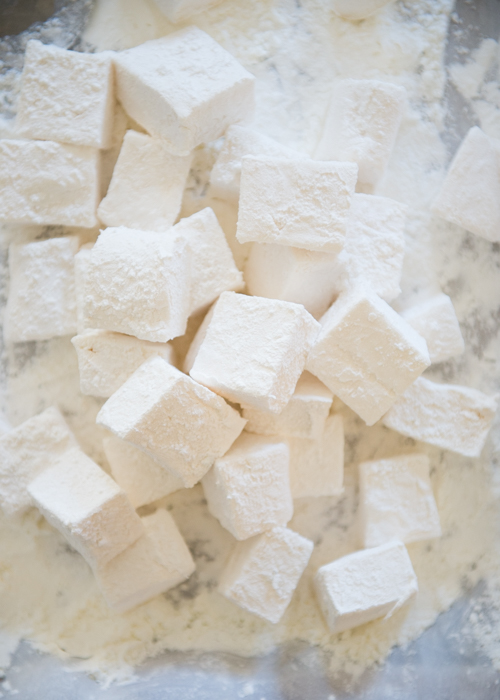
You can use small cookie cutters depending the season or if you are giving then as gifts. For basic cutting, use a pizza cutter because it’s sharp, quick, and it doesn’t have to be cleaned off between cutting like knives do.
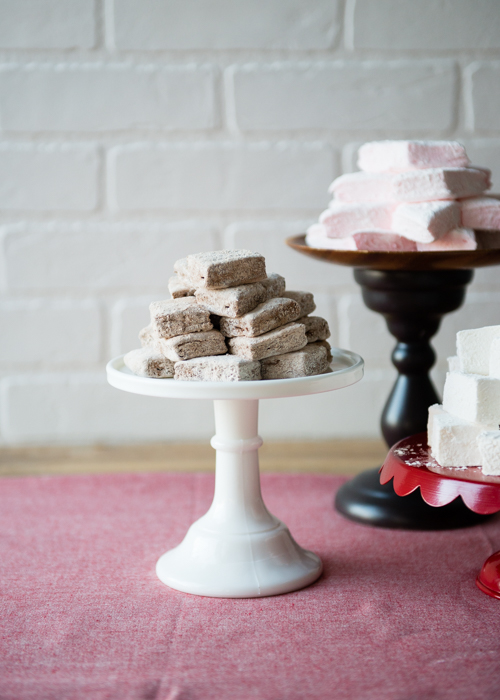
Wouldn’t it be so fun to have jars or towers of homemade marshmallows for a hot cocoa bar?!
Homemade Marshmallows
Recipe source: Baking: From My Home to Yours by Dorie Greenspan
Serves: Makes about 1 pound marshmallows
Ingredients
About 1 cup potato starch or cornstarch
2 tablespoons light corn syrup
2 (¼-ounce) packets unflavored gelatin
3 large egg whites, at room temperature
Pinch cream of tartar or salt
¾ cup cold water, divided
1¼ cups granulated sugar
1 tablespoon pure vanilla extract
Instructions:
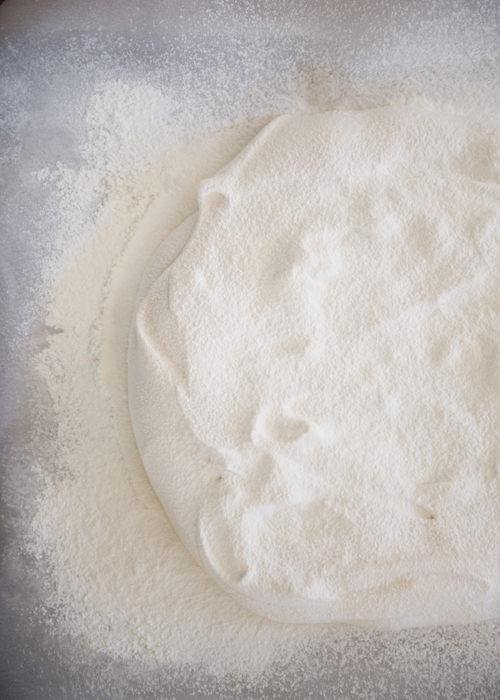
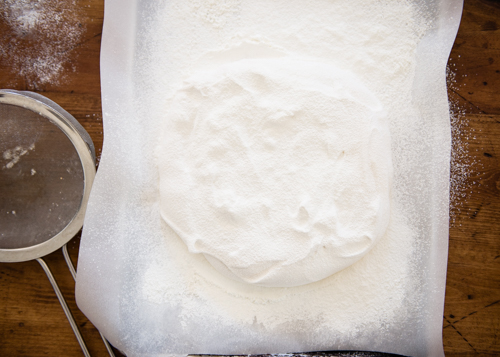
1. Line a rimmed baking sheet with parchment paper and sift potato or cornstarch evenly and liberally over the paper. Have a candy thermometer at hand.
2. Stir ⅓ cup of the water, 1¼ cups of the sugar and the corn syrup together in a medium saucepan. Bring the mixture to a boil, stirring until the sugar dissolves. Once the sugar is dissolved, stop stirring and continue to cook the syrup until it reaches the hard ball stage, about 255-260° F on the candy thermometer, about 10 minutes. (Cook to a lower temperature for high altitude.)
3. Meanwhile, place the remaining water (about 7 Tablespoons) in a microwave-safe bowl. Sprinkle the gelatin over the top of the water, stir quickly with a fork, and let stand until spongy, about 5 minutes. Place in the microwave for 20-30 seconds, or until gelatin is liquid and completely dissolved. Set aside until ready to use.
4. Place the egg whites in the clean, dry bowl of a stand mixer fitted with a whisk attachment. Turn the mixer onto medium and start beating the egg whites. Add the pinch of cream of tartar to the bowl and continue beating until they form soft peaks. Add the remaining 1 Tablespoon of sugar and continue beating until the firm peaks form, but the egg whites are not dry. (Doing this slowly on medium to medium-high speed will create more stability in the egg whites.)
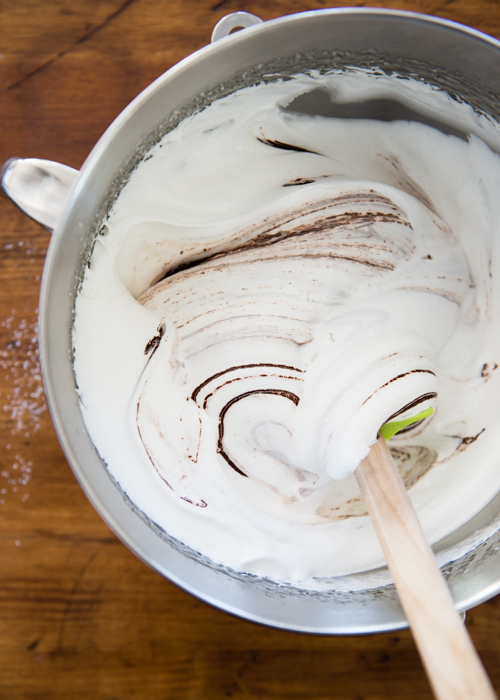
5. Once the sugar syrup has come to the right temperature, remove it immediately from the heat. With the motor running on medium-high speed, add the syrup to the egg whites in a slow, steady stream, allowing the syrup to run down the side of the mixing bowl. Don’t add the syrup too quickly, or the whites may curdle. Once all of the syrup has been added, beat for about 30 seconds and add the melted gelatin in a slow, steady stream. Increase the speed to high and beat for 3-5 minutes or until the mixture is very thick and fluffy.
6. Add the vanilla and beat for another 30-60 seconds. Turn mixer off and remove bowl. Scrape down the sides of the bowl with a large spatula.
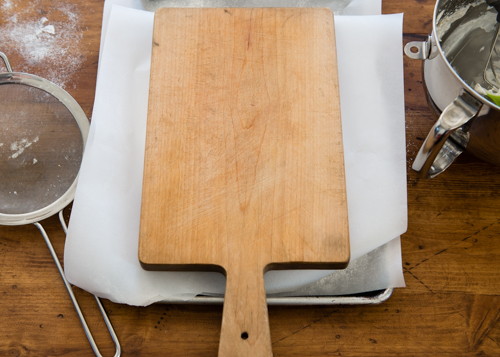
7. Pour the marshmallow creme onto the prepared baking sheet. Spread the marshmallow creme as evenly as possible. Dust the top with more sifted potato starch or cornstarch. Lay another piece of parchment paper over the top. If desired, lay a cutting board on top to flatten it. Allow the marshmallow to set up for 3 hours, or overnight before cutting.
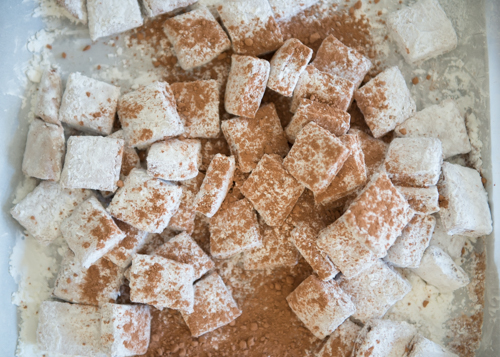
8. To cut the marshmallows, dust small cookie cutters with cornstarch and cut into shapes. Dust each cut marshmallow with more cornstarch. If using a knife, you will need to rinse and dry it frequently. Pizza cutters and kitchen shears are a great way to cut into pieces.
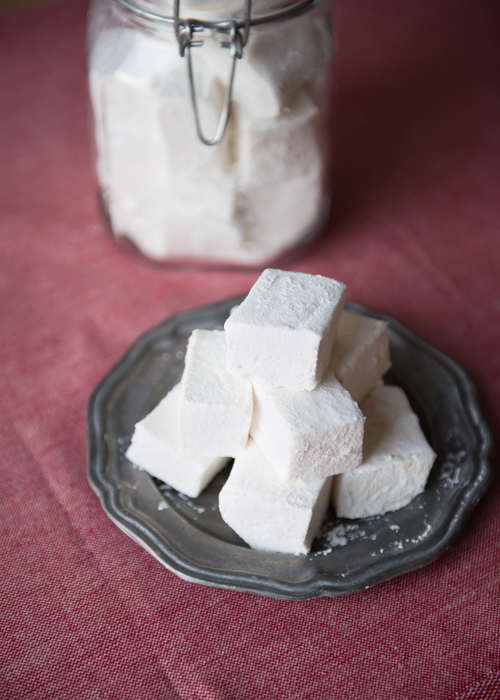
9. To store: Keep cut marshmallows in an airtight container with a little extra cornstarch for about 1-2 weeks. Add more cornstarch to prevent sticking as needed.

Variations:
– Peppermint. After the gelatin has been added, beat in a few drops of peppermint oil/extract (to taste), and a few drops of red food coloring.
– Chocolate. Stir together 3 ounces melted unsweetened chocolate with 1 1/2 tablespoons cocoa powder and fold into the marshmallow after the gelatin has been added. Be sure to stir well – the chocolate sets up quickly and can leave hard lumps in the marshmallows.
– Fruit. Fold in 1/4 cup fresh fruit puree after the gelatin has been added.
Notes:
– The cream of tartar or salt helps stabilize the beaten eggs whites. If you’d never use cream of tartar for anything else, don’t buy it. Just use a pinch of salt. It works almost the same. 🙂
– Marshmallows need to rest for a little while to cool down and set up. To speed up the process, place somewhere very cold, like a refrigerator or outside, for 15-30 minutes. If the marshmallows feel cool to the touch, they’re ready to be cut.
– To ensure the marshmallows are flat on both sides, I weigh down the top with a heavy cutting board. A large, but not-too-heavy book will also work.
– The marshmallows can be made thick or thin — just spread the marshmallow creme out to the desired thickness.
– If you hate the taste of the potato or cornstarch, use half powdered sugar for dusting the marshmallows. I also use a few tablespoons of cocoa powder for the chocolate ones.
– If you don’t have a candy thermometer, consider investing in one. You can test the sugar syrup to see if it’s cooked to the hard ball stage by dropping some of the syrup into ice water. If it forms a firm to hard ball, it’s ready. If it cracks when it hits the cold water, it’s gone too far.
– You can use honey, golden syrup (such as Lyle’s), tapioca, or brown rice syrup in place of the corn syrup. Just be aware that it may affect the color of the finished marshmallows.
– Using organic or raw sugar is also fine, but plain old granulated sugar seems to work the best.
– Separating eggs is the easiest when the eggs are very cold, but use room temp egg whites when beating. They will beat more quickly and form a sturdier meringue.
– Lastly, don’t toss those egg yolks! Use them to make custard, ice cream, creme brulee, lemon curd, or bread pudding.
__
Credits: Images, styling & recipe by Lindsey Johnson.

